Programming, upgrading, and debugging your robotics projects depend on first connecting your VEX V5 Brain to a computer. Knowing how to correctly connect VEX V5 Brain to computer will improve your experience whether your interests are hobbyist exploring the great possibilities of robotics or instructor helping children through their first robotics competition. From hardware configuration to software installation and troubleshooting typical problems, this article will walk you through the procedures to establish this connection.
1. Understanding the VEX V5 Brain
Understanding the VEX V5 Brain and its importance in the VEX Robotics ecosystem will help one to appreciate the connecting process. Comprising a strong microcontroller and several connections for connecting motors, sensors, and other devices, the connect vex v5 brain to computer is the central control unit for VEX V5 robots. It boasts a built-in display, a simple interface, and great programming capacity. Users of a computer can program their robots, upload code, and effectively control settings by tying it in.
2. Required Equipment
To connect your VEX V5 Brain to a computer, you’ll need the following equipment:
- VEX V5 Brain: Ensure your VEX V5 Brain is powered on and functional.
- USB A to Micro-USB Cable: Establishing a connected connection between the VEX V5 Brain and your PC requires this. Usually, you find the cable in your VEX V5 set.
- Computer:You have a Mac or Windows computer. Make sure it satisfies the VEXcode V5 minimum system criteria.
- VEXcode V5 Software: You will create and publish applications to the VEX V5 Brain using this programming environment.
3. Step-by-Step Connection Process
3.1 Connecting the VEX V5 Brain to Your Computer
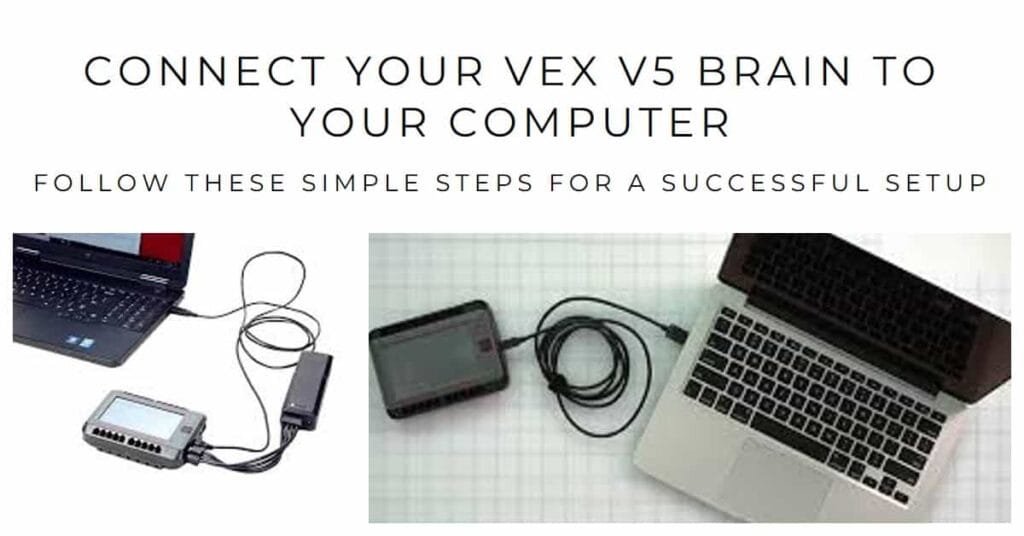
- Locate the USB Port: On the side of your VEX V5 Brain, find the USB port. This is usually labeled and is a micro-USB connection.
- Connect the USB Cable:Plug the micro- USB end of your USB A to Micro-USB cable into the VEX V5 Brain. On your computer, plug the other end—USB A—into a USB port.
- Power On the VEX V5 Brain:Verify that your VEX V5 Brain is turned on. Usually found at the top of the Brain, pushing the power button will enable you to do this. Wait until the startup procedure finishes; the screen should show the VEX logo then the main menu.
3.2 Installing VEXcode V5
If you haven’t already installed VEXcode V5, follow these steps:
- Download VEXcode V5: Visit the Downloads part of the official VEX Robotics page. Find VEXcode V5 and download the version fit for your running system—Mac or Windows.
- Install the Software: Launch the acquired file and use the on-screen directions to install VEXcode V5 on your machine.
- Launch VEXcode V5: Launch VEXcode V5 software following installation. The program will search connected VEX devices on its own initiative.
3.3 Setting Up the VEX V5 Brain in VEXcode V5
- Detecting the VEX V5 Brain: Launching VEXcode V5 should instantly find the associated VEX V5 Brain. Look for a pop-up or alert stating the Brain is linked.
- Select the Brain: If asked, choose among the linked device list the VEX V5 Brain. This will enable program uploads by tying the software to the Brain.
- Update Firmware (if necessary): The VEX V5 Brain occasionally could call for a firmware upgrade. In such circumstances, VEXcode V5 will alert you. Update the firmware to the current version following on-screen directions to guarantee compatibility and maximize performance.
4. Uploading Programs to the VEX V5 Brain
Once you’ve successfully connected the VEX V5 Brain to your computer and set it up in VEXcode V5, you can start uploading programs:
- Create a New Project: In VEXcode V5, create a new project by clicking on “File” and selecting “New Project.” This will open a blank coding interface.
- Write Your Code: Use the drag-and-drop interface or text-based coding (if you’re familiar with C++) to write your robot’s program.
- Upload to the VEX V5 Brain:
- Once you’ve finished writing your code, click the “Upload” button (usually represented by an upward arrow).
- VEXcode V5 will compile your program and upload it to the VEX V5 Brain. A notification will appear when the upload is successful.
- Run the Program: After uploading, you can run the program directly from the VEX V5 Brain’s interface. Select your program from the menu and hit “Start.”
5. Troubleshooting Connection Issues
Sometimes, you may encounter issues while trying to connect your VEX V5 Brain to your computer. Here are some typical issues together with their fixes:
- Brain Not Detected: Ensure that the USB cable is securely connected to both the VEX V5 Brain and the computer. If needed, try utilizing an other USB port or cable.
- VEXcode V5 Not Recognizing the Brain: Restart both the VEX V5 Brain and the VEXcode V5 software. Sometimes a basic reboot fixes communication problems.
- Firmware Update Fails: If the firmware update fails, disconnect the VEX V5 Brain, close VEXcode V5, and restart your computer. Then reconnect everything and try updating again.
- Software Compatibility Issues: Make sure you’re using the latest version of VEXcode V5. Check the VEX Robotics website for updates if you encounter problems.
7. Conclusion
Connecting your VEX V5 Brain to a computer is a straightforward process that opens up a world of possibilities for programming and enhancing your robotics projects. By following the steps outlined in this guide, you can efficiently establish a connection, update firmware, and upload programs to your VEX V5 Brain. Whether you’re a novice or an experienced user, mastering this connection is fundamental to leveraging the full capabilities of the VEX Robotics system.
Remember to troubleshoot any issues that arise and keep your software up-to-date to ensure smooth operation. With a solid understanding of how to connect your VEX V5 Brain to a computer, you’re well on your way to creating innovative robotic solutions. Happy coding!
(FAQs)
Q1: Can I connect multiple VEX V5 Brains to one computer?
While you can connect multiple VEX V5 Brains, only one can be active at a time in VEXcode V5. You’ll need to disconnect and connect each Brain individually.
Q2: Is it possible to program the VEX V5 Brain without a computer?
Yes, you can program the VEX V5 Brain using the VEX V5 Brain’s built-in programming interface, but connecting to a computer with VEXcode V5 provides more extensive options and capabilities.
Q3: What should I do if my VEX V5 Brain gets stuck during startup?
If your VEX V5 Brain freezes during startup, try performing a hard reset by holding the power button until the Brain turns off, then turn it back on.
Q4: Can I use VEXcode V5 on a tablet or mobile device?
As of now, VEXcode V5 is designed for desktop and laptop computers, but check for updates or alternative applications for mobile devices on the VEX Robotics website.
Q5: How often should I update the VEX V5 Brain’s firmware?
It’s best to update the firmware whenever a new version is released or when you notice performance issues or compatibility problems.